98% of smart assistants and 72% of smart TVs use hard coded DNS servers. 1 The inclusion of ads on smart TVs even by well known brands like Samsung, Sony and LG (archive) significantly increases the need for forced DNS adblocking of devices that deliberately ignore DHCP provided DNS. A Pihole DNS by itself can prevent ads from devices that are well behaved, but misbehaving devices will have to be forced by either a firewall or router.
Prerequisites
It is assumed that a working Pihole newer than version 5 is set up at 192.168.1.11 with an accessible admin interface at http://192.168.1.11 and that a working Edgerouter X is set up at 192.168.1.1 with an accessible admin interface at https://192.168.1.1.
It might be necessary to downgrade the Edgerouter X connection to HTTP depending on settings.
The device to be regulated is assumed to be located at 192.168.1.60, and it will be referred to as “the TV” from now on.
It is assumed that the TV has a reason for being on the network, since the most effective way of preventing something from communicating through a network is by not connecting it to the network.
The tutorial below assumes that a single service must be used through a smart TV, and that everything else must be blocked.
Be aware that 192.168.**1**.0 and 192.168.**0**.0 are two popular address spaces for home networks that look alike at a glance.
Make sure that you’re using the correct network for you, despite what the examples say.
DNS blocking on Pihole
The images are from version 5.1.1 of the Pihole Web Interface.
Log in to the Pihole Web Interface at http://192.168.1.11/admin.
Go to “Groups” under “Group Management” in the left menu as seen in figure 1.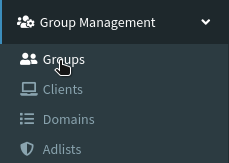
Add a new group called “TV” and put any comments in the “Description” field as seen in figure 2.

Go to “Clients” through the same menu as figure 1.
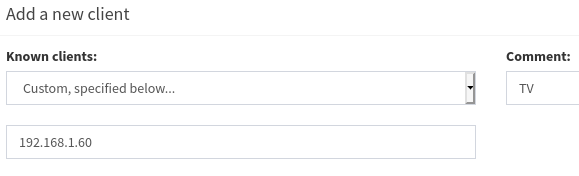
Add the address of the TV as seen in figure 3 and include a short description. It is recommended to identify the address in some way, even if it’s just “TV”, since few people can correctly remember the IP-addresses of every device on their LAN. If the address of the TV is not found in the dropdown you can manually insert it using the “Custom, specified below” option.
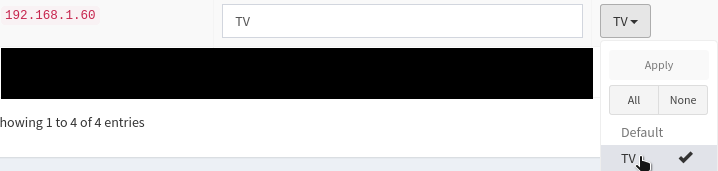
Assign the new client to the group made in figure 2 and remove it from the “Default” group as seen in figure 4.
Next, go to “Domains” through the same menu as figure 1.
Add [a-z]*|[0-9]*|\. as a “Domain”, and Block all domains. as the “Comment” as seen in figure 5, and click “Add to Blacklist” just below.
Remember to check the “Add domain as wildcard.
This will block all domains.
![Adding the regular expression '[a-z]*|[0-9]*|\.' to 'Domain' in order to block all domains. Make sure to check 'Add domain as wildcard'. The 'Add to Blacklist' button is found just below this.](pihole/block-all-domains.png)
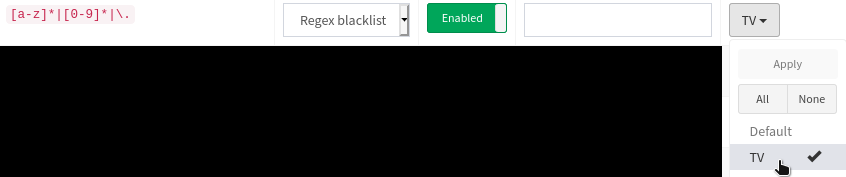
Scroll down until you find the filter you added in figure 5.
Ensure that the [a-z]*|[0-9]*|\. filter you just added is a “Regex blacklist”, “Enabled” and applied only to the group you created in figure 2.
It must not be applied to the “Default” group, otherwise all domains will be blocked on all devices.
All DNS queries are now blocked on the TV, and you must manually approve individual services that you require. To find out whether you need to set up your Edgerouter X for DNS redirection you should turn on your TV and check if network features are completely broken. If they are, your TV respects the DHCP provided DNS, and if they are not you either have not set your Pihole as the DNS in your DHCP settings or your TV does not respect DHCP settings.
You will now need to approve the necessary domains for your service to work.
After trying to access the required service on your TV, go into the “Query Log” under “Long-term data” in the left menu.
Select the date and time range “Today”.
Scroll down and narrow the search to your TV by entering 192.168.1.60 in the “Search” field like in figure 7.
The exact domain depends on the service you’re trying to allow.
If you’re in doubt, do a search for the domain in question and read up on what it does.
It might be necessary to do this over several iterations, as services on the TV might require different domains at several points.

DNS Redirection on Edgerouter X
If your TV does not use the DHCP DNS by default, you should set up DNS redirection on a firewall or router.
Log into the web interface of your Edgerouter X and click the “Firewall/NAT” tab as shown in figure 8.

Next, click the “NAT” tab as shown in figure 9.

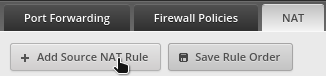
Click the “Add Source NAT Rule” button as shown in figure 10.
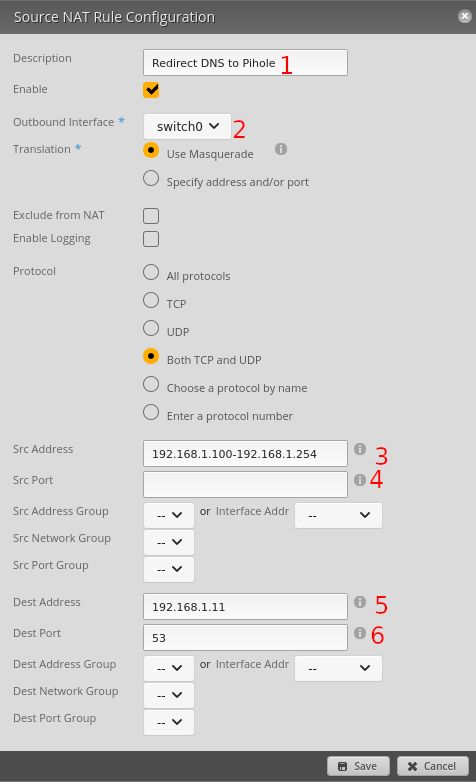
Set up the rule as shown in figure 11, paying special attention to the below fields:
- Description: Name of the rule.
- Outbound Interface: If you used the Basic Wizard to set up the Edgerouter X, you should set this to
switch0. - Src Address: The addresses that this rule should apply to. Since my DHCP range is
192.168.1.100to192.168.1.254that’s what I’m putting in. If you only want to apply to the TV, set it to192.168.1.1.60. - Src Port: Leave blank.
- Dest Address: Set to the address of your Pihole. Set to
192.168.1.11. - Dest Port: Set to
53.
Click save on figure 11 and then “Add Destination NAT Rule” just below the button in figure 10.
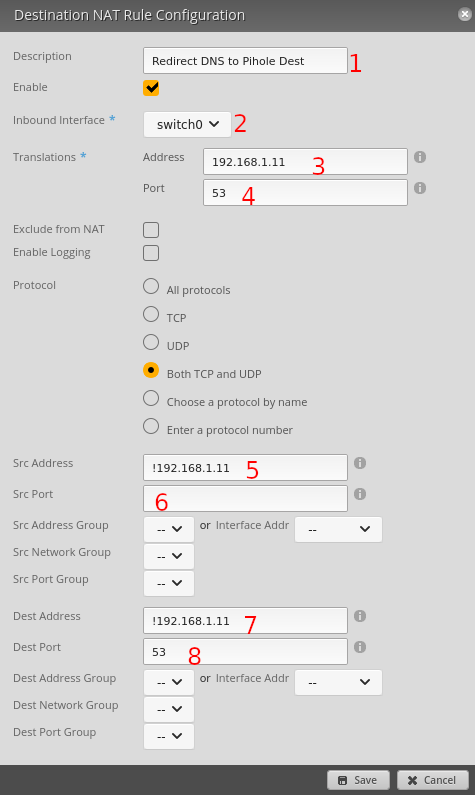
Set up the rule as shown in figure 12, paying special attention to the below fields:
- Description: Name of the rule.
- Inbound Interface: Same as in figure 11.
- Translations Address: Set to the address of your Pihole,
192.168.1.11. - Translations Port: Set to
53. - Src Address: Set to addresses you want to redirect DNS for. For everything except your pihole set to
!192.168.1.11, noticing the!which meansNOT. - Src Port: Leave blank.
- Dest Address: Set to the same as Src Address.
- Dest Port: Set to 53.
Testing
In order to test your solution you should, on Windows or Linux, run nslookup [blocked domain] 8.8.8.8 and see that you get a 0.0.0.0 result back.
M. H. Mazhar and Z. Shafiq, “Characterizing Smart Home IoT Traffic in the Wild”, 2020 IEEE/ACM Fifth International Conference on Internet-of-Things Design and Implementation (IoTDI), pp. 2, Mar. 2020. ↩︎